
However, choosing a rental screen for a church environment requires balancing factors that standard corporate event planners don’t have to deal with, such as camera flickering on your live streams, awkward viewing angles in historical architecture, and restricted budgets.
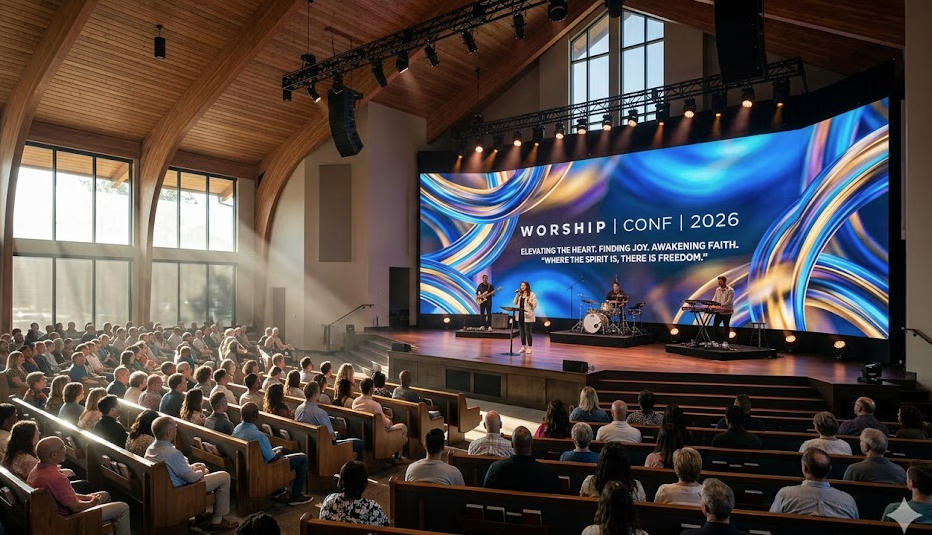
This guide breaks down exactly how to select the right LED rental package for your next church event without overspending.
1. The “Golden Formulas” for Sizing and Resolution
The two biggest mistakes churches make when renting LED screens are undersizing the screen (making text unreadable at the back) and paying for a pixel pitch that is too fine (wasting money on resolution the congregation can’t see). You can easily calculate exactly what you need using these simple industry standards.
The 1-Foot-Per-Millimeter Rule (Pixel Pitch)
Pixel pitch is the distance in millimeters between the centers of two adjacent LEDs (e.g., P1.9, P2.6, P3.9). The smaller the pitch, the closer people can sit without seeing the individual dots.
- The Formula:
1 mm of Pixel Pitch = 10 Feet of Minimum Viewing Distance - Application: Measure the distance from the stage to your very first row of seats. If the front row is 25 feet away, a P2.6mm wall is your absolute sweet spot. If your front row is pushed back 40 feet, a P3.9mm wall will look completely crisp to them, and it will cost significantly less.
The 1/6 to 1/8 Height Rule (Screen Sizing)
A screen that looks massive in a warehouse will look remarkably small when mounted in a grand sanctuary with 30-foot ceilings.
- The Formula:
Screen Height = Distance to the Farthest Row ÷ 6 (or 8) - Application: If your sanctuary is 80 feet deep from the stage to the back wall, your LED wall height should be roughly 10 to 13 feet tall. To maintain a standard 16:9 widescreen aspect ratio, a 10-foot-tall screen would need to be roughly 18 feet wide.
2. The Livestream Trap: Refresh Rate Matters
Since the shift toward hybrid worship models, your online congregation is just as important as your in-person one. If your church broadcasts its services via YouTube, Facebook Live, or a dedicated streaming platform, you must look closely at a specification called Refresh Rate.
Warning: Budget rental panels often run at a standard 1,920Hz refresh rate. While this looks fine to the human eye in the room, it interacts poorly with camera shutters. If you use these panels, your online viewers will see distracting, flickering black lines or “water波纹” (Moiré patterns) floating across the screen.
For church events with live camera feeds or streaming, explicitly demand Broadcast-Grade Panels from your AV vendor:
- Minimum Requirement: 3,840Hz refresh rate.
- Premium Requirement (For High-End Cameras): 7,680Hz refresh rate.
3. Choosing Your Layout Strategy
How you place the screens on your stage drastically impacts your congregation’s sightlines. There are three common rental configurations for church conferences:
- Option A: The Single Center Wall (Best for Smaller Sanctuaries)
- The Setup: One large 16:9 screen placed directly behind the pastor.
- Pros: Highly cost-effective; creates a singular, powerful focal point for graphics and video illustrations.
- Cons: Can sometimes block existing architectural elements like crosses or choir lofts.
- Option B: Dual Side Screens (Best for Wide Rooms or Deep Balconies)
- The Setup: Two identical screens placed on the far left and right wings of the stage.
- Pros: Keeps the center of the stage clear for physical scenic designs, scenery, or a choir. It provides great sightlines for people sitting on the extreme left or right sides of the room.
- Cons: Forces the congregation to look away from the speaker to read lyrics.
- Option C: The Multi-Screen Matrix (The Premium Conference Choice)
- The Setup: A wide, short center LED banner flanked by vertical LED “columns” or side screens.
- Pros: Ultimate flexibility. You can run ambient motion backgrounds across the center and distinct text/lyrics on the side panels.
- Cons: Requires advanced multi-screen video processors (like a NovaStar system) and an experienced media operator to manage the different layers of content.
4. Operational Realities: Front-Service & Rigging
Before signing an AV rental contract, your church’s tech director or building manager needs to confirm two physical constraints of the venue:
Front-Service vs. Rear-Service Panels
- Rear-Service: Requires technicians to have 2 to 3 feet of open space behind the screen to fix cables or swap parts. If your stage setup requires pushing the LED wall flat against a back wall, rear-service will not work.
- Front-Service: Individual LED modules can be popped out from the front using a vacuum magnetic tool. This allows the wall to be mounted flush against your stage backing, saving precious stage real estate.
Ground-Stacked vs. Flown Mounting
- Ground-Stacking: The LED panels lock into a heavy-duty aluminum or steel framing system that sits directly on the stage floor. It is fast, safe, requires no ceiling modifications, and keeps labor costs low.
- Flown/Rigged: The screen is suspended from the ceiling using steel cables and motors. This creates a stunning, modern look, but it requires a certified structural assessment of your church’s ceiling beams to ensure they can handle the weight (assembled LED walls easily weigh 500 to 1,500+ lbs).
5. Summary Checklist for Church Committees
When presenting options to your church board or finance committee, use this quick breakdown to align expectations:
| Sanctuary Type | Average Attendance | Recommended Pitch | Typical Rental Screen Size | Best Mounting Method |
|---|---|---|---|---|
| Portable / Mobile Church | 50 – 150 | P2.6 | 10 × 6 ft (3 × 1.8 m) | Ground-Stacked Frame |
| Medium Sanctuary | 150 – 500 | P2.6 – P2.9 | 16 × 9 ft (5 × 2.7 m) | Ground-Stacked / Wall-Mount |
| Large Cathedral / Balcony | 500 – 1,200+ | P3.9 | 20 × 11 ft (6 × 3.4 m) | Flown / Truss Rigged |