Setting up a rental LED wall on-site can be a high-pressure task. With tight event timelines and no room for error, a proper, safe installation is just as important as the quality of the screen itself.
Whether you are rigging a hanging backdrop for a live concert or building a ground-supported video wall for a corporate conference, this guide breaks down the actual steps, wiring logic, and safety checks required to get the job done right.
1. What to Check Before You Start (The Pre-Check)
Most issues on-site don’t come from faulty hardware—they come from poor planning. Before unpacking your flight cases, double-check these three things:
-
The Power Load: Don’t guess your power consumption. Calculate the maximum draw of your total cabinets. If your wall draws 30 kW at peak, you need a power distribution box (distro) that can safely handle that load. More importantly, balance your phases (L1, L2, L3) evenly across the distro to avoid tripping breakers mid-event.
-
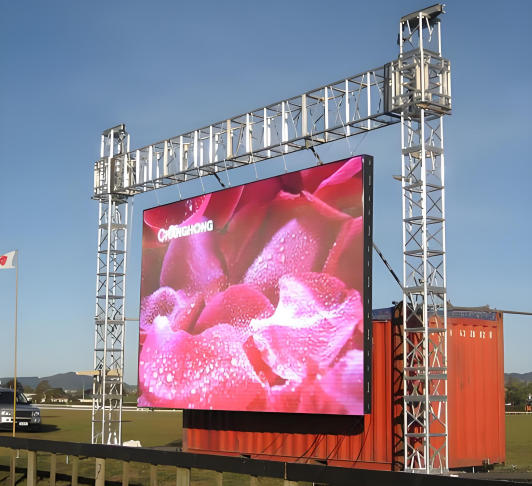
Environment & IP Ratings: If you are outdoors, you need panels rated at least IP65 to handle potential rain, and the brightness needs to be at least 4,500–5,000 nits to fight direct sunlight. For indoor events, prioritize a finer pixel pitch (like P2 or P2.5) because the audience sits much closer.
-
The Ground or Rigging Points: Is the floor perfectly level? If hanging, can the venue’s roof trusses safely support the total weight of the LED panels plus the fly bars?
2. Choosing Your Setup Method: Hanging vs. Ground-Stacking
Depending on the venue and stage design, you will use one of two standard setups.

Option A: Hanging (Flying) Setup
Common for concerts and large stages where you need to maximize floor space.
-
Leveling the Fly Bars: Secure your hanging bars (fly bars) to the venue’s truss using rated shackles and hoists. The absolute golden rule here is to use a laser level. If your first row of fly bars is off by even 2mm, that gap will compound as you hang more rows, resulting in visible seams or structural strain.
-
Locking the Cabinets: Lift the first row of cabinets and engage the top quick-locks into the fly bar. Work row by row, going downwards. Always double-check both the vertical and horizontal alignment pins before snapping the side locks shut.
-
Safety Cables: Never rely solely on the cabinet locks. Every vertical column of panels should have secondary steel safety wires secured back to the main truss.
Option B: Ground-Stacking Setup
Ideal for exhibitions, keynotes, or venues where you cannot rig anything from the ceiling.
-
The Base Frame: Lay out your heavy-duty base truss or stacking system on the floor. Use the adjustable screw feet to compensate for any unevenness in the venue floor.
-
Building Upward: Mount the first row onto the base. As you stack higher rows, you must attach rear reinforcement pipes or scaffolding back-locks. This structural bracing ensures the wall won’t tip over if someone accidentally bumps into it from behind.
3. Signal and Power Cabling (The Core Routing)
Once the mechanical structure is solid, the next step is running the cables.
-
Power Daisy-Chaining: Run the main power feed from your distro to the first panel, then daisy-chain the rest using short looping cables (like Neutrik PowerCON). Watch your limits: Depending on the voltage (110V vs. 220V) and panel consumption, you can usually only chain 4 to 6 panels on a single 20A circuit. Overloading this loop will fry the internal power supplies.
-
Data Routing (Signal): Run a Cat6 Ethernet cable from your sending box (e.g., NovaStar) to the first cabinet. Route the data in an ‘S’ or ‘Z’ pattern across the screen.
-
Always Setup Redundancy: For any high-stakes live event, run a backup signal loop. Connect a separate Cat6 cable from the last panel back to the backup port on your sending card. If one data cable gets pinched or fails during the show, the signal instantly reverses, and the screen keeps running without dropping a frame.
4. System Mapping and Troubleshooting
With everything wired up, turn on the power distribution box and boot up your processing software (like NovaLCT).
-
Screen Mapping: Configure your screen connection in the software to match exactly how you routed your physical Cat6 data cables. Save the configuration and send it to the receiving cards.
-
The R-G-B-W Test: Before handing the screen over to the VJs or media team, run full-screen solid colors (Red, Green, Blue, White). This is the fastest way to spot dead pixels, bad module ribbons, or off-color batches.
-
Fixing Visible Seams: If you see a bright or dark line between two cabinets, do not force them. Loosen the quick-locks slightly, make sure no cables are trapped between the frames, press the modules flush, and re-lock.
Looking for Reliable Rental LED Hardware?
Setting up a flawless video wall requires a mix of good technique and reliable hardware. If your panels have heavy frames, poor locking mechanisms, or cheap power supplies, your on-site setup time will double.
If you are upgrading your rental inventory or need high-refresh, easy-to-install LED panels for your upcoming projects, get in touch with our team today. We provide full technical specs, case studies, and robust hardware built for the road.
Frequently Asked Questions
How many rental LED panels can I hang on a single fly bar safely?
This depends strictly on the manufacturer’s engineering rating and the panel’s weight. Generally, most professional rental panels (around 7-8 kg per cabinet) allow a maximum stack of 12 to 15 panels verticallyon a single standard fly bar. Always consult the product’s structural load chart and never exceed the maximum rigging capacity of your hoists or truss.
Why is my rental LED screen flickering or showing lagging lines during a live broadcast?
This is usually a camera-matching issue caused by a low refresh rate. For rental screens used in broadcast, virtual production, or stages with heavy photography, you need a refresh rate of at least 3,840 Hz(driven by high-end ICs like MBI or ICN). If the hardware allows it, you can also adjust the shutter speed of your video camera to match the screen’s frequency, or tweak the clock settings in your sending controller software.
Can I mix different batches of rental LED cabinets together for one large event?
Mechanically, yes, if they use the same frame design and locking system. However, visually, mixing different batches can cause color and brightness mismatchesbecause LEDs degrade slightly over time, or the raw diodes may come from different binning lots. If you must mix them, use your processing software to run a chromaticity calibration (pixel-by-pixel calibration)on-site to balance the color uniformity across the entire wall.
What is the maximum distance I can run an Ethernet data cable from the control room to the LED screen?
Standard Cat6 copper network cables can reliably transmit the signal up to 100 meters (approx. 328 feet)without data loss. If your control desk or FOH (Front of House) is further than 100 meters away from the stage, you must use Fiber Optic Convertersand heavy-duty tactical fiber cables to prevent signal dropouts and latency.